Adding Documents
You can add supporting documents, such as text files, audio files, video files, document links, and so on to an environment.
To add documents to environments, follow these steps:
- Go to Application Menu > Data Catalog > Metadata Manager > Explore.
- On the Explore tab, click an environment tile.
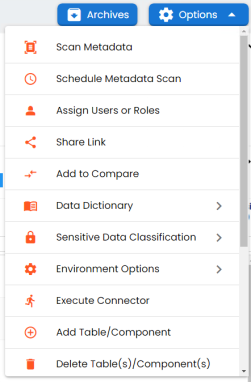
- Click Options.
The available options appear. - Click Environment Options > New document.
- Enter appropriate values in the fields. Fields marked with a red asterisk are mandatory. Refer to the following table for field descriptions.
- Click
 .
. - Preview (
 )
) Use this option to preview the document for your information.
- Edit (
 )
) Use this option to update the document details.
- Delete (
 )
) Use this option to delete the document that is not required.
The Environment Documents page appears.
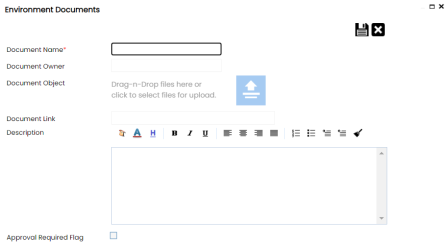
|
Field Name |
Description |
|---|---|
|
Document Name |
Specifies the name of the physical document being attached to the environment. For example, Source Environment Details. |
|
Document Object |
Drag and drop document files or use |
|
Document Owner |
Specifies the document owner's name. For example, John Doe. |
|
Document Link |
Specifies the URL of the document. For example, https://drive.google.com/file/l/2sC2_SZIyeFKI7OOnb5YkMBq4ptA7jhg5/view |
|
Description |
Specifies the description about the document. For example: The document has information about the environment details. |
|
Approval Required Flag |
Specifies whether the document requires approval. Select the Approval Required Flag check box to select the document status. |
|
Document Status |
Specifies the status of the document. For example, In Progress. This field is available only when the Approval Required Flag check box is selected. |
The document is saved in the Environment Documents grid.
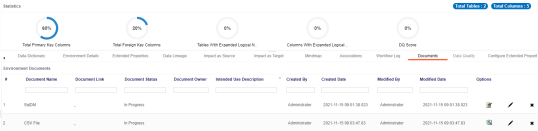
Once a supporting document is added, use the following options:
|
Copyright © 2026 Quest Software Inc. |